Installing VirtualBox From Precompiled Binaries
The VirtualBox binaries can be downloaded from here: http://www.virtualbox.org/wiki/Downloads. If the PUEL license is ok for you and there's a package for your distribution, you can install that package. For example, there is a VirtualBox .deb package for Ubuntu 6.10 (Edgy Eft), so if you use Ubuntu 6.10, you can use that package. I've also tested this package successfully on Ubuntu 7.04 (Feisty Fawn), so it seems you can use that package there, too.To install the VirtualBox .deb package, please open a terminal window (Applications > Accessories > Terminal) and become root:
sudo su
Then install some prerequisites for VirtualBox:
apt-get install bcc iasl xsltproc xalan
libxalan110-dev uuid-dev zlib1g-dev libidl-dev libsdl1.2-dev
libxcursor-dev libqt3-headers libqt3-mt-dev libasound2-dev libstdc++5
linux-headers-`uname -r` build-essential
Then go to the VirtualBox download page and pick the right .deb package for your Ubuntu version and download it to your system:
cd /tmp
wget http://www.virtualbox.org/download/1.3.8/VirtualBox_1.3.8_Ubuntu_edgy_i386.deb
wget http://www.virtualbox.org/download/1.3.8/VirtualBox_1.3.8_Ubuntu_edgy_i386.deb
After the download has finished, you can install VirtualBox like this:
dpkg -i VirtualBox_1.3.8_Ubuntu_edgy_i386.deb
You might get asked the following questions:
Do you agree with the PUEL license terms? <-- Yes
Should the vboxdrv kernel module be compiled now? <-- Yes
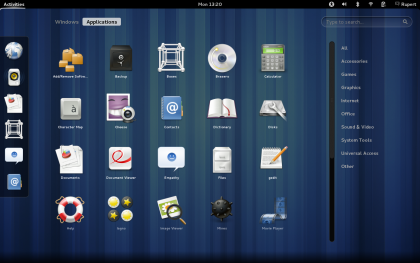
That's it already. You can now find VirtualBox under Applications > System Tools:

2 Installing VirtualBox From The Sources
If InnoTek's PUEL license doesn't work for you and you prefer the GPL and/or there's no .deb package for your Ubuntu version, you can compile VirtualBox from the sources. The sources are released under the GPL.To install VirtualBox from the sources, please open a terminal window (Applications > Accessories > Terminal) and become root:
sudo su
Then install some prerequisites for VirtualBox:
apt-get install bcc iasl xsltproc xalan
libxalan110-dev uuid-dev zlib1g-dev libidl-dev libsdl1.2-dev
libxcursor-dev libqt3-headers libqt3-mt-dev libasound2-dev libstdc++5
linux-headers-`uname -r` build-essential
We can download the latest VirtualBox sources from InnoTek's SVN repository; to do so, we must install subversion first:
apt-get install subversion
Next we download the VirtualBox sources to the /usr/src/virtualbox directory:
mkdir /usr/src/virtualbox
cd /usr/src/virtualbox
svn co http://virtualbox.org/svn/vbox/trunk vbox
Then we compile VirtualBox as follows:cd /usr/src/virtualbox
svn co http://virtualbox.org/svn/vbox/trunk vbox
cd vbox
./configure
source ./env.sh
kmk all
cd out/linux.x86/release/bin/src
make
make install
Afterwards we load the vboxdrv kernel module and copy the VirtualBox files to appropriate locations on the disk:./configure
source ./env.sh
kmk all
cd out/linux.x86/release/bin/src
make
make install
cd ../
modprobe vboxdrv
echo vboxdrv >> /etc/modules
modprobe vboxdrv
echo vboxdrv >> /etc/modules
cp -prf *.so /usr/lib/
mkdir /usr/local/virtualbox
cp -prf * /usr/local/virtualbox/
ln -s /usr/local/virtualbox/VirtualBox /usr/local/bin/VirtualBox
ln -s /usr/local/virtualbox/VBoxSVC /usr/local/bin/VBoxSVC
Next we create the group vboxusers and add our desktop user (e.g. falko) to it:mkdir /usr/local/virtualbox
cp -prf * /usr/local/virtualbox/
ln -s /usr/local/virtualbox/VirtualBox /usr/local/bin/VirtualBox
ln -s /usr/local/virtualbox/VBoxSVC /usr/local/bin/VBoxSVC
groupadd vboxusers
usermod -G vboxusers -a falko
Now we must change the permissions of /dev/vboxdrv so that it can be accessed by the vboxusers group:usermod -G vboxusers -a falko
chmod 660 /dev/vboxdrv
chgrp vboxusers /dev/vboxdrv
In order to prevent that the permissions of /dev/vboxdrv are reset at boot time, we edit /etc/udev/rules.d/40-permissions.rules and add the following line at the end of that file:chgrp vboxusers /dev/vboxdrv
gedit /etc/udev/rules.d/40-permissions.rules
[...] KERNEL=="vboxdrv", GROUP="vboxusers", MODE="0660" |

In the window that opens please select System Tools and then click on New Item:

In the Create Launcher window, please fill in the following details:
- Type: Application
- Name: VirtualBox
- Command: VirtualBox (please take care about upper/lower case - this is a command, if you don't write it right, the application won't start)
- Comment: You can fill in anything you like or leave it blank.

VirtualBox should now be shown in the list of items for the System Tools menu. Click on Close to leave the window:

Afterwards, you can find VirtualBox under Applications > System Tools:

This is what it looks like when VirtualBox is started:
 Read More......


